Tackling Revisions
NaNoWriMo is OVER. Many of you find yourselves with a finished novel in hand--perhaps a product of a grueling November or perhaps a novel written some other time. Either way, if you need help knowing what to do next, then this post might just be for you.
The purpose of this post (and the revisions workshop on my personal site) is to help writers avoid feeling overwhelmed, daunted, or just plain lost. I'm offering a starting point for you to bounce off of; I'm showing you how I avoid feeling overwhelmed, daunted, and lost; and I'm hoping you can use this info to ultimately find your own revising rhythm.
Please realize that while this method works for me, it may not work for you. There is no "perfect solution" to writing or revising, and it's up to you to fine-tune your own approach. I don't even follow this method anymore (not to the letter at least). I have worked out a natural groove that uses the bones of this method, and I want to teach YOU the bones so YOU can eventually find your own groove.
Now let's get started, shall we?
Revising a Novel
You’ve written a novel. Yay! Good job!
Now what...? You revise, right? And, er...how do you that? For some (probably most), the task is knee-shaking scary. Stomach-twisting terrifying. In a word, yikes.
But it doesn’t have to be! In fact, revisions can be FUN. Revising is my favorite step of the novel-creating-process because I am 100% in control.
Tackling revisions requires two things:
Having a very clear, specific end goal in mind.
Breaking it all into small, manageable chunks.
Setting Your Goal
You can’t reach a goal if you don’t know what the goal is. In other words, unless you know what you want to have at the end of your revisions, then you’ll simply be revising aimlessly and wasting time. You need to have a very clear, very specific idea of the book you want to have at the end of your revisions. That way, when you work, you will always be working toward a clear, measurable objective.

To establish what you WANT to have, you have to first know what you ACTUALLY have. And to know what you actually have, you have to first read your entire novel. Yes, the whole thing from start to finish.
Don't worry if your first reaction is to cry DISAPPOINTED! a là Hercules. Very few people are pleased with their first drafts. You will likely find a lot of Very Good Parts and a lot of Very Bad Parts.
This is okay; this is normal.
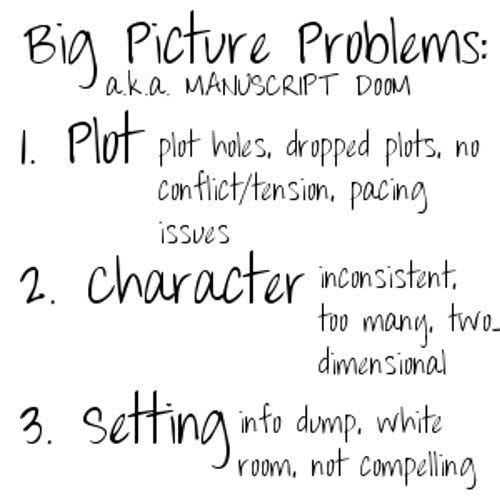
Our goal is to now figure out exactly why those Very Bad Parts are bad.
Thus, as you read, you should take notes on a sheet of notebook paper. Do NOT write on the manuscript or edit—seriously. You don't want to mess with anything yet. I learned (after wasting MONTHS) that editing small things now is useless. You might end up rewriting a scene or even cutting it, so why line-edit it now? Just like working with an editor, you will do line-edits and small stuff LAST.

When you finish reading and determining where the big stuff falls apart, you will then figure out what category those problems fall under. So, you see that there's this GIANT ISSUE with the villain—he's not that bad on page 24 and then he's kinda goofy on page 87...then he's just downright horrible on page 226. This would (as I'm sure you can guess) qualify as a character issue.
Actually, when I receive a revision letter from my editor, I always break things apart in the same way. I literally cut the letter apart by issue, then I tape it all back together under the appropriate category. This way, I can see ALL my plot issues at once, all my character issues at once, and so on. I make a Master List.
Once you've got your master list, you need to boil down what your novel would be like if it were perfect. If you had just bought it in stores and none of those problems were there, what would it be like? This was a trick I learned in Holly Lisle’s How to Revise Your Novel Crash Course. As she says, you can’t hit a target you can’t see.

This is your goal. That perfect novel is what you WANT, and that is what you will guide your revisions toward.[1. If you want more detail, check out my main blog, you'll find worksheets and a more in-depth explanation of how to find problems and how to define your goals.]
Breaking It Apart
Now that you know what you WANT, you’re going to break that apart too. As the famous advice from Anne Lamott goes: take it word by word. In this case, we want to take it scene by scene—bite-sized, manageable pieces. I always—ALWAYS—create an outline of my novel before I edit. I used to do this by hand, but now I use the index card portion of Scrivener.

You can, of course, use whatever you want to make an outline. The important thing is to write a single sentence for EACH scene in your novel. This way, you can always have a clear idea of the story without having to scour through it constantly.
(I do this even if it’s my 20th round of revisions. I ALWAYS have an outline of the current book. It saves time and helps me stay organized. When it comes to revising on deadlines, it’s a lifesaver! Also, if you use Scrivener, it does all this for you. This program is AMAZO, in case you aren't already aware.)
Now that you know your big picture problems and your perfect book goal, you are going to set up a Plan of Attack. This plan will allow you to:
Form solutions to solve your big problems.
Execute said solutions in an organized, logical fashion.
So start by making solutions. Brainstorm, mull, and stew for as long as it takes (but also be willing to let new ideas and solutions come as you actually revise). For example, if I know my villain is inconsistent, then my goal is to automatically make him consistent. And, since he's also SUPER dark in my Perfect Book, then I need to make sure to "darken his character" every time he's on the page. Et voilà! Problem : solution :: inconsistent villain : darkening every time he appears. Now write it down and figure out the solutions to all your other Big Problems.
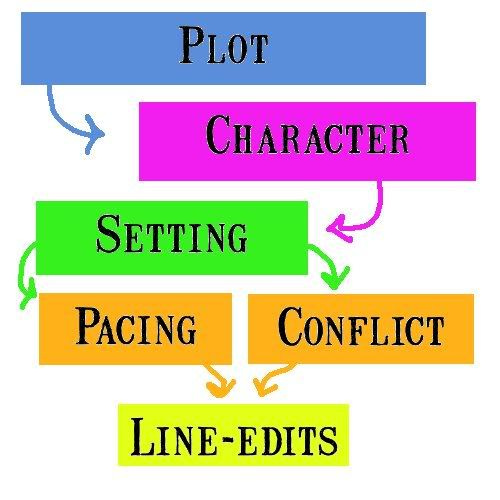
Once you know your solutions, they should be organized by plot, character, setting, etc. Now we look at the “scale” of each problem/solution. Typically plot issues are the largest scale, followed by character, setting, pacing/conflict, and finally line-level.

If you go to your outline (or index cards), you can now make notations on little post-its (or a pen in the margins or whatever). For example, on the scene 2 card, when the villain is introduced, you might write, "Make darker!! Cut the nice stuff."
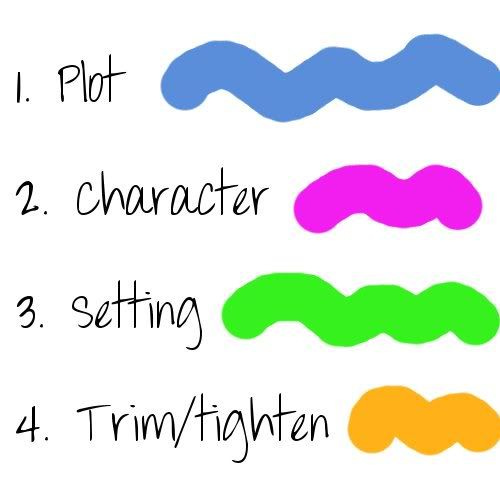
Now, if you were me, you would color code the post-it/pens. That way you know at a glance what sort of problems you're dealing with in a scene. For example, I know all my index cards with blue post-its have plot issues and should be tackled first. Make sense?

Even now that I have my own, looser revising "groove", I still color code like crazy (and Scrivener makes it really easy to do!).
Once I take my index cards and separate them by post-it color. I will pull out all the scenes with blue post-its first and work through those. Then the ones with pink are next. I always know what each scene needs because it’s on my index card, and because I’m working on one big problems one at a time (and not moving chronologically through every, I can make sure the solution holds together.
[box type="note"]I hand-write all my edits on the printed version, and then I double-check my edits when I type everything in at the end. It’s time-consuming, but effective! I am also a "visual learner", and it's the only way I can work.[/box]
In Summary
I realize this is dense...and probably confusing. But hopefully you can see that, when you don’t travel in the dark and you take the journey one step at a time, revising is really quite manageable. It can even be easy (I find it easier than writing first drafts!). Sometimes it might even be fun.
You’re 100% in control, and rather than creating something from nothing, you’re refining what you already have.
Now go revise, and good luck!
What about you—do you have a revisions process you follow? Do you have any questions about this method?
[box type="download"]NOTE: My entire revising method (with worksheets and lessons) is available as printable PDFs. To print it all, head here.[/box]
